DimlightEditor
A really cool subproject that we used for Dimlight Dungeon was the custom editor that we've made during the weeks after our engine was in a solid state. We used IMGUI as the UI implementation of our editor. I helped out with integrating core engine features into the editor like the ability to change/add components, show a list of all the available objects and creating window system where you have the game view and a scene view to navigate throughout the levels without moving the game's camera (very similar to Unity's Game and Scene windows).
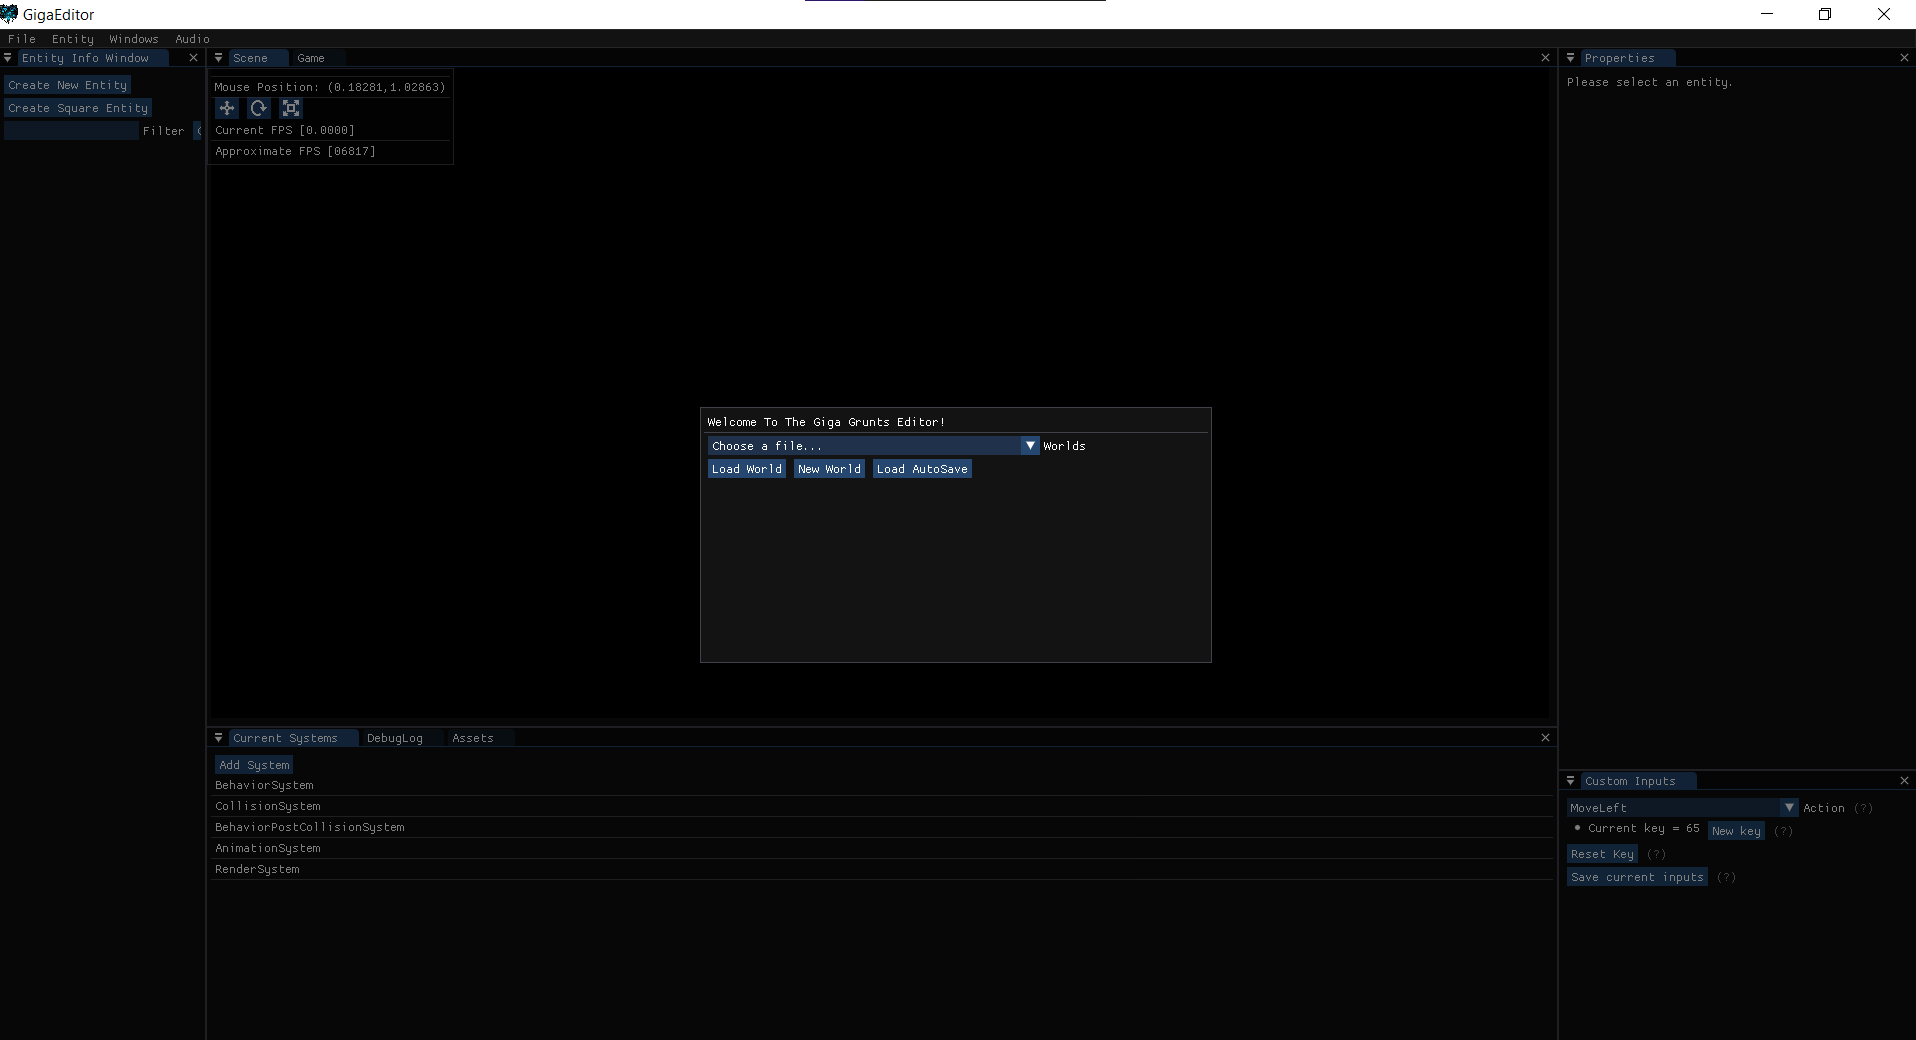 Intro screen for the game's editor
Features
Entity View
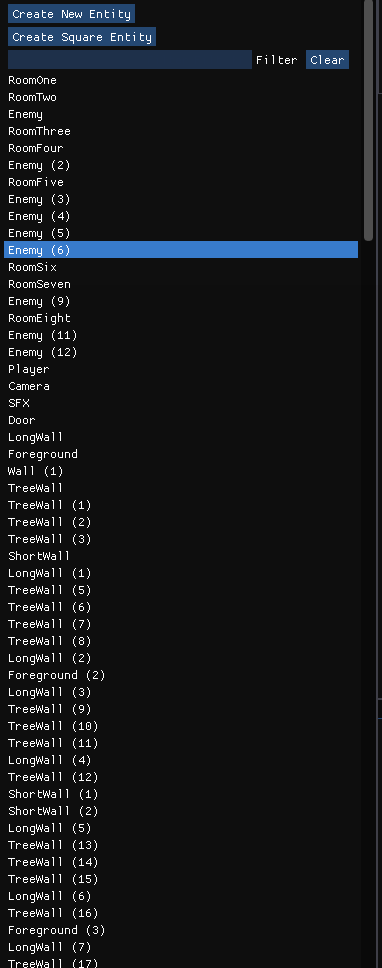 Example of the Entity View
The entity view is a list of all the entities in a world. The view window will show each entity with their respective name attached to them. If an entity has no name, then a placeholder is shown instead. You can click each entity to select it and each window will update with the properties of the newly selected entity. Right-clicking will show options to duplicate, copy, or paste data into the entity name that was clicked on.
Inspector
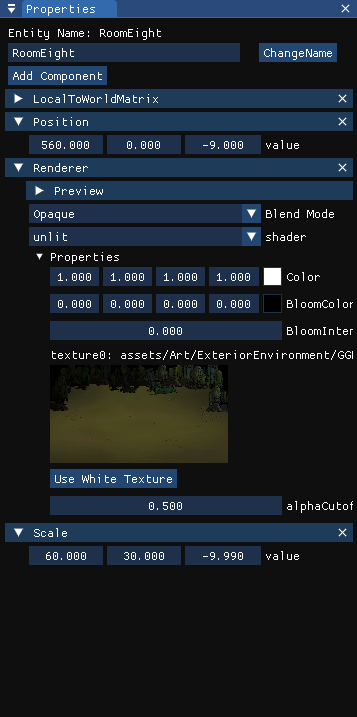 Example of the Inspector
This window will show all the components of the currently selected entity. You can edit all the components that are connected to said entity freely and allows you to save at any time. Any object that is serializable can also be edited through the inspector window.
Custom Inspectors
By default, the inspector will find the type of a component and its member variables and call the best possible IMGUI call for said type. For example, a glm::vec2 type will be associated with the function ImGui::DragFloat2(...) for editing purposes.
However, you can override the inspector draw call for a single comp to be completely different than usual, usually this was done for complicated components such as the renderer and the animation component. The setup took a lot of inspiration from unity's Custom Editor class where you would create a class to override the inspector's layout of the compoenent with a OnInspectorGUI() overrride call.
For this example we will want to change the Position component to render something differently.
Example Code
PositionCustomEditor.h
class PositionCustomEditor: public CustomEditor<Position>
{
    public:
        void OnInspectorDraw(Position& pos);

    //for Serialization purposes
    REGISTER_CUSTOM_EDITOR(Position)
}
PositionCustomEditor.cpp
//since this function is now being overritten, you can call any IMGUI calls and will be used instead of the default values the Editor will provide
void PositionCustomEditor::OnInspectorDraw(Position& pos){

    //change it to read only instead.
    ImGui::LabelText ( "Position: (%f, %f, %f)", pos.value.x, pos.value.y,pos.value.z);
}
Scene
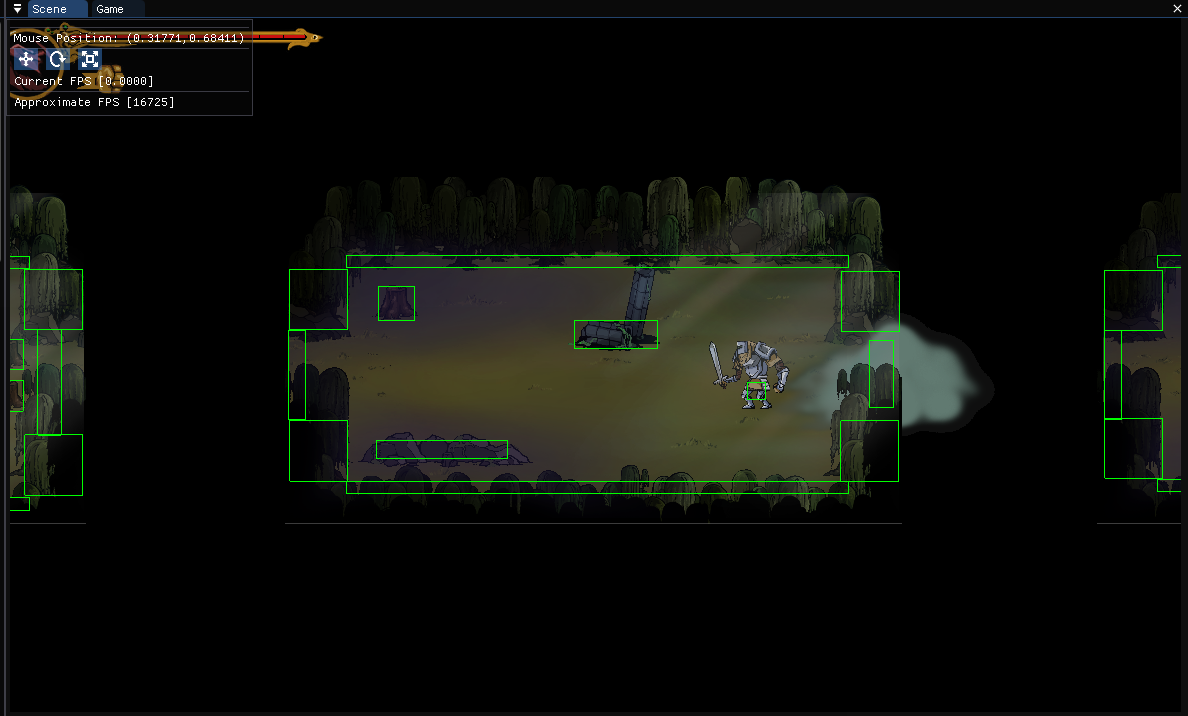 Example of the Inspector
The scene window is an extra viewport of the level that allows for free movement and debug drawing. You can also select entity by clicking on a object in the scene window and once it is selected, it can be rotated, scaled and translated through some gizmos. It acts very similar to Unity's Scene view in 2D.
Game
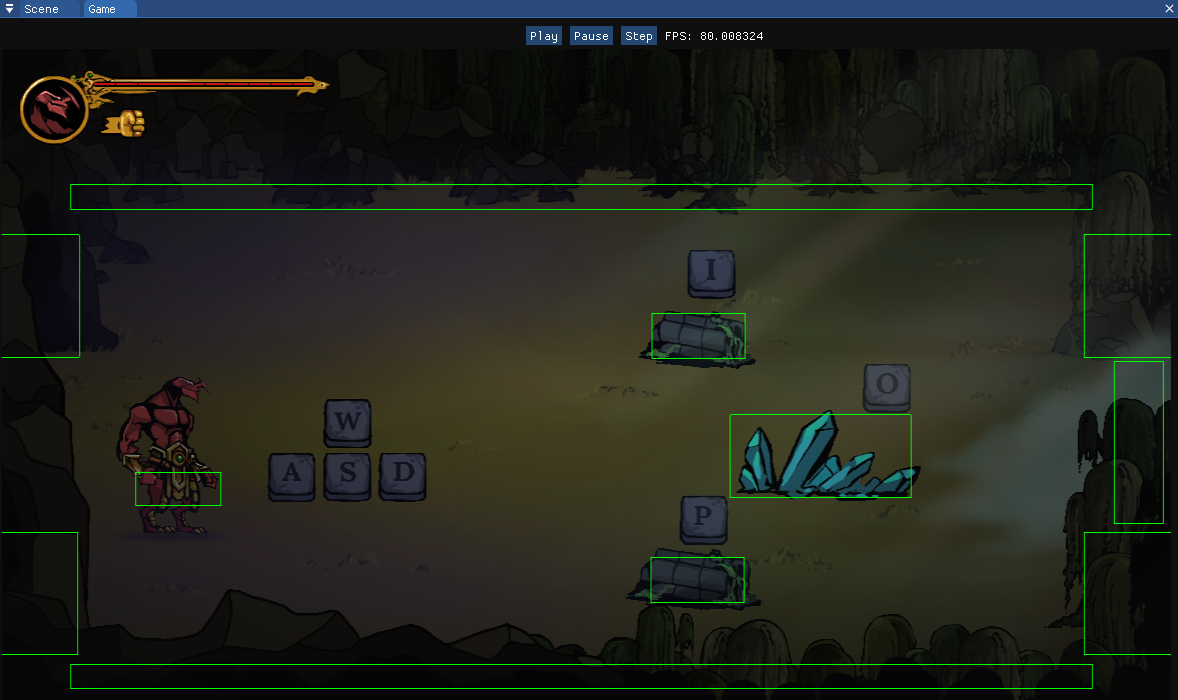 Example of the Game View
The Game view is what the engine will see when the game gets compiled. What gets shown in this window is what you will see in the final game. Like the Unity Game Window, you Play, Pause, and Step through the game loop for the current level.
Assets
The asset window contains all the textures in the main Assets folder. You can filter and search through textures and can drag and drop them to the scene view where on top of entity to change the entity texture.
Systems
The system window allows to remove or add existing systems as long as they are derived from the System class in C++.
All together
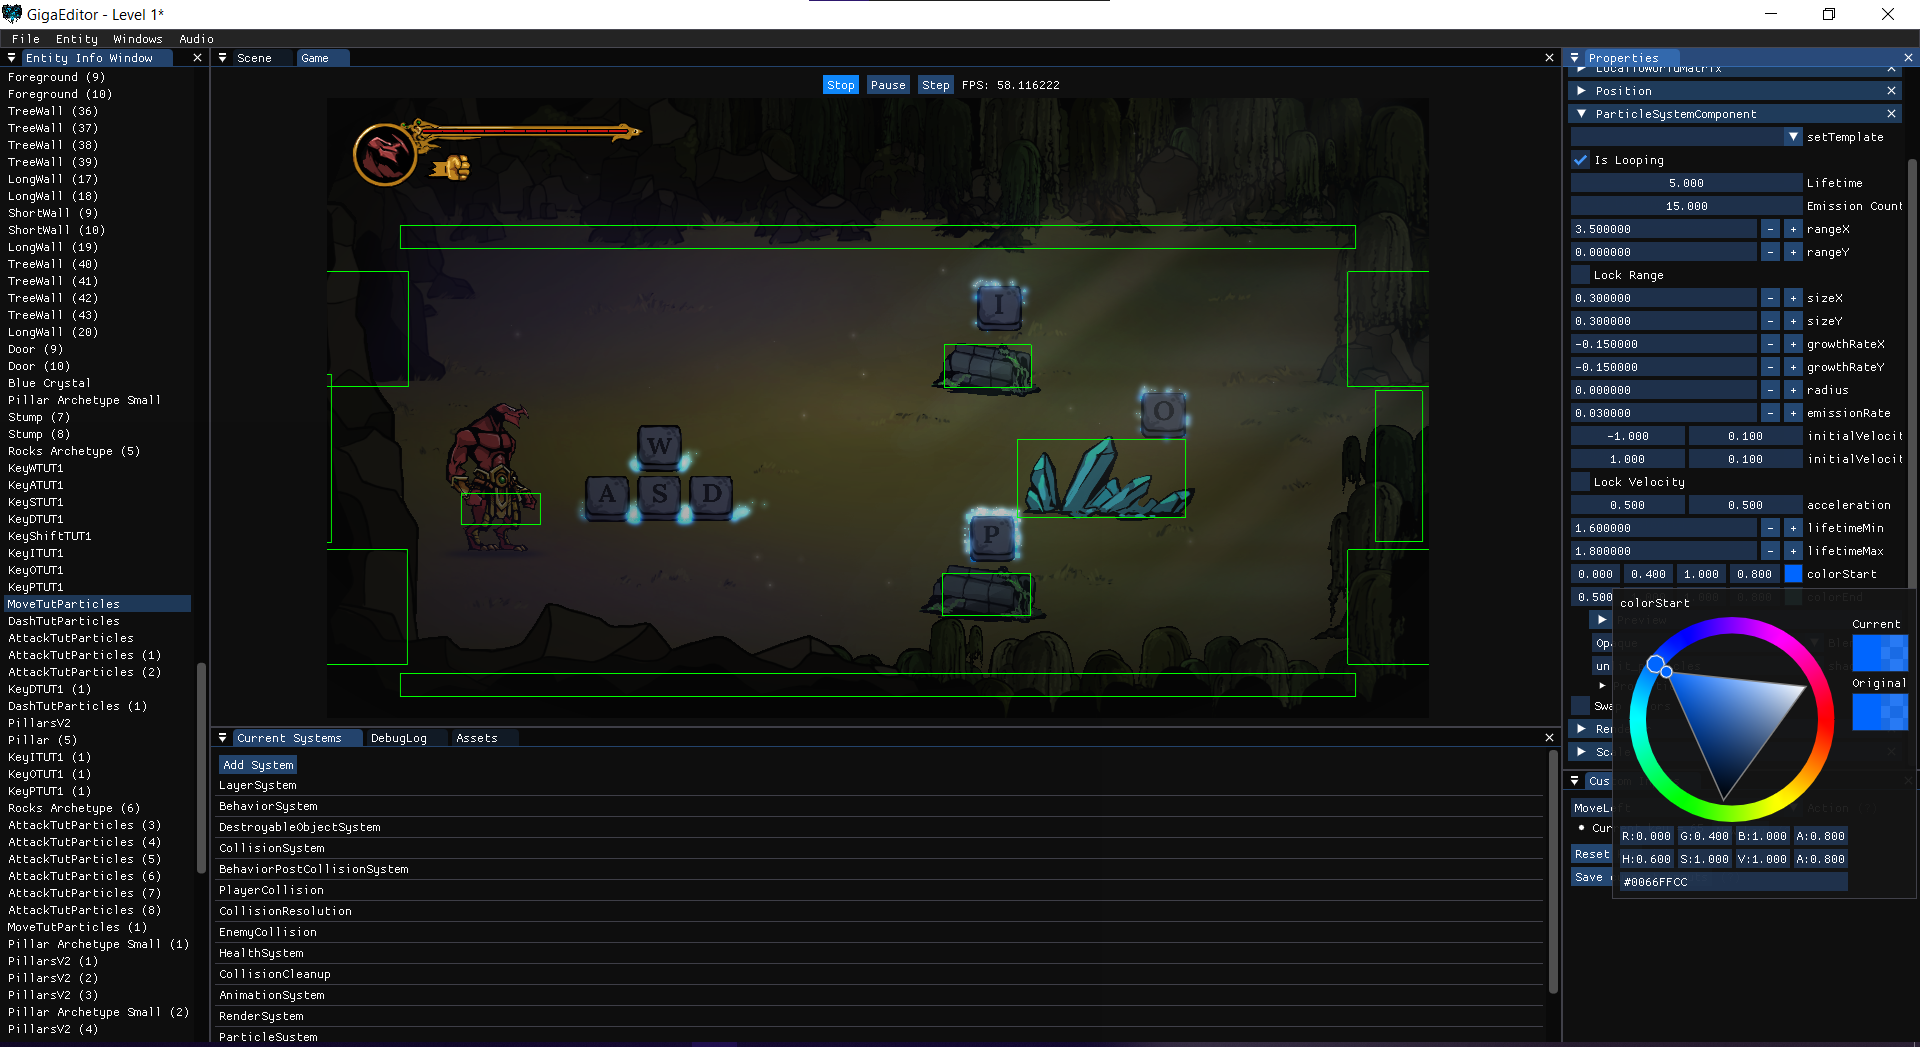 Editor's full set of features


